http://prettylittleheart.blogspot.mk/search/label/review

Thursday, November 6, 2014

DIY Beauty Hacks Every Girl Should Know


 DIY Beauty Hacks Every Girl Should Know


1. Turn any eyeliner pencil into super-intense gel liner.

Turn any eyeliner pencil into super-intense gel liner.

2. Color your entire lid with white eyeliner to make eyeshadow colors POP.

Color your entire lid with white eyeliner to make eyeshadow colors POP.

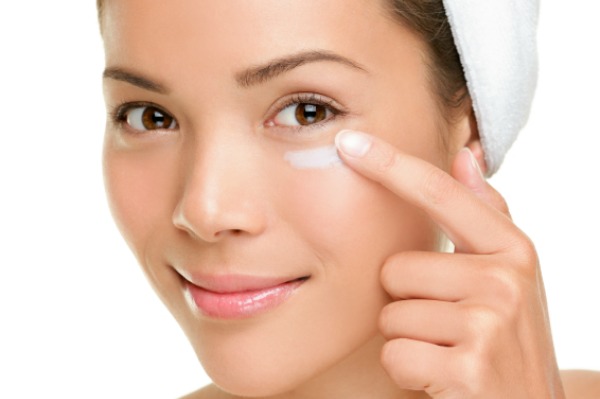
3. Cover up dark circles by applying concealer in a triangle shape.

Cover up dark circles by applying concealer in a triangle shape.

4. To avoid getting lipstick on your teeth, stick your finger in your mouth and pull it out.

Your finger will get the excess product, not your teeth.

5. To get a much more professional eyeshadow look, use Mac paint pot in Soft Ochre underneath.

To get a much more professional eyeshadow look, use Mac paint pot in Soft Ochre underneath.
Brush a coat of it on OVER your eyeshadow primer, before you start applying color.

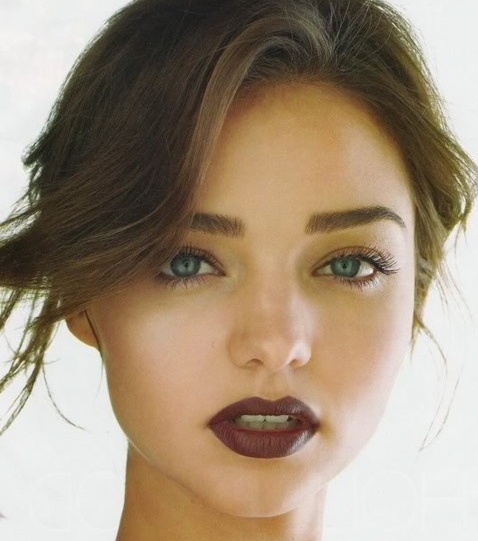
6. Learn how to set your lipstick so it LASTS.

Learn how to set your lipstick so it LASTS.
After you have applied your lipstick, hold a tissue over your lips and lightly dust translucent powder over the tissue.

7. Instead of shelling out for Lip Venom, add a drop of peppermint oil to your favorite lip gloss.

Instead of shelling out for Lip Venom, add a drop of peppermint oil to your favorite lip gloss.

8. Use baby powder to get DIY falsies.

Use baby powder to get DIY falsies.
Between applying each coat of mascara, dip a Q-tip in baby powder and run across your lashes, focusing on the tips. The second coat will attach to the powder for a longer, fuller look.

9. Apply your lipliner like this to get an even Cupid’s bow shape.

Apply your lipliner like this to get an even Cupid's bow shape.

10. Get rid of split ends by twisting locks of hair and snipping the ones you see sticking out.

Get rid of split ends by twisting locks of hair and snipping the ones you see sticking out.

11. Here’s an incredibly fast, polished topknot you can do in your car.

Here's an incredibly fast, polished topknot you can do in your car.
1. Gather your hair up into a high ponytail at the top of your crown. Secure with an elastic.
2. Divide the ponytail ends into two sections and use both hands to twist each section down to the ends.
3. Wrap each twist in opposite directions around the base of your elastic. Make sure each twist is wrapped around evenly.
4. Secure with bobby pins.

12. Save money by making your own shellac manicure.

Save money by making your own shellac manicure.

13. Follow this pattern for contouring.

Follow this pattern for contouring.
This image makes contouring seem way less daunting.

14. When going for a dramatic winged look, draw the outline of the shape, and then fill it in.

When going for a dramatic winged look, draw the outline of the shape, and then fill it in.
You’ll get a much more precise line.

15. Touch up a French manicure with a rubber band.

Touch up a French manicure with a rubber band.

16. Use a business card to pull your lid up so you can get the mascara right to the base of your lashes.

Use a business card to pull your lid up so you can get the mascara right to the base of your lashes.
Hold an old credit or business card above the upper lashes and wiggle the brush away back and forth at the roots.

17. Use a spoon to get the perfect wing shape for your eyeliner.

Use a spoon to get the perfect wing shape for your eyeliner.

18. Easiest nail art EVER.

Easiest nail art EVER.
Use Band-Aids to create little polka dots on your nails.

19. Forgo eyeshadow and instead, crosshatch gel liner onto lids and blend for long-lasting, budge-proof coverage.

Forgo eyeshadow and instead, crosshatch gel liner onto lids and blend for long-lasting, budge-proof coverage.

20. Check your makeup when you get into your car.

Check your makeup when you get into your car.
The different light source will expose any makeup mistakes you might have missed in your bathroom.

21. If you are doing a smokey look that involves a lot of blending, use one brush to apply and a clean one to blend.

If you are doing a smokey look that involves a lot of blending, use one brush to apply and a clean one to blend.
This will keep your look from getting too muddy looking.

22. Want to wear glitter nail polish without going through the pain-in-the-ass removal process?

Want to wear glitter nail polish without going through the pain-in-the-ass removal process?
Use Elmer’s glue as the base coat. The manicure will peel off neatly, and it supposedly can last for up to a week!

23. Use it to get the neatest manicure ever.

Use it to get the neatest manicure ever.
Apply it with a brush and then peel it off after you’re done with your manicure. It works better than Vaseline because you can actually see it, so you can just rub it off if any actually gets on the nail.

24. Use pale frosted eyeshadow to get fuller, 3D lips.

Use pale frosted eyeshadow to get fuller, 3D lips.

25. Flat-iron your braids to create long-lasting waves.

Flat-iron your braids to create long-lasting waves.

26. This one easy step will make your eyes brighter and more noticeable.

27 DIY Beauty Hacks Every Girl Should Know

27. Know where to apply your perfume so it lasts all day.

Know where to apply your perfume so it lasts all day.

Tuesday, October 28, 2014

Fall makeup trends


The Egg Diet

The Egg Diet

The basis of this diet is chemical, not quantities. It claims you can lose a stone in a week if followed exactly. Do not follow this diet for more than a week at a time.
Allowed drinks: Black coffee, black tea, lemon tea, grapefruit juice, tonic water, soda water and tap water (unlimited amounts).
Salad consists of: Lettuce, tomato and celery only.

Day 1

Breakfast:         1 slice of dry toast and grilled tomatoes Lunch:                Any amount of fresh fruit Dinner:               2 hard boiled eggs, salad and grapefruit

Day 2

Breakfast:         Grapefruit and 1 boiled egg Lunch:                Roast chicken (any amount) and tomatoes Dinner:               Grilled steak and salad

Day 3

Breakfast:         Grapefruit and 1 boiled egg Lunch:                2 hard boiled eggs and salad Dinner:              2 grilled lamb chops, celery and cucumber

Day 4

Breakfast:         1 slice of dry toast and 2 poached eggs Lunch:                Any amount of fresh fruit Dinner:               2 grilled lamb chops, celery and cucumber

Day 5

Breakfast:        1 slice of dry toast and 2 poached eggs Lunch:               2 poached eggs and tomatoes Dinner:              Fresh or tinned fish and salad

Day 6

Breakfast:        1 boiled egg and 1 glass of grapefruit juice Lunch:               Any amount of fresh fruit Dinner:             Roast chicken, carrots and cabbage

Day 7

Breakfast:       2 scrambled eggs and tomatoes Lunch:              2 poached eggs and spinach Dinner:            Grilled steak and salad
Egg Diet

Special notes:

  • Refrain from all foods not included above
  • No substitutes allowed
  • Eat only what is shown or do without
  • No eating between meals
  • No alcoholic drinks, milk, butter, oil or fat

Saturday, October 25, 2014

DIY Eyelash growth serum

You will need:
- A small empty container (to store your hair growth serum)
- A clean mascara wand or just a Q-tip (to apply your serum)
- Castor oil
- Coconut oil
- Sweet almond oil
- Avocado oil (optional)
- Vitamin E (optional)
Pour equal parts of castor oil, coconut oil and sweet almond oil into a small, clean container (2 table spoons of each oil will do). Optional: add a little bit of avocado oil (1 tea spoon) and one vitamin E capsule into this mixture. Shake the container to mix well all the ingredients.
Dip a clean Q-tip or a clean mascara wand into your serum and gently apply it on your eyebrows and eyelashes.
Apply this hair growth serum every night before going to sleep. In a couple of weeks time you should see amazing results: stronger, longer and healthier eyelashes and thicker eyebrows.

Wednesday, October 22, 2014

Pineapple Upside Down Pancakes

Ingredients
  • Batter
  • ½ cup sour cream
  • ½ milk
  • 1 large egg
  • 1 cup all purpose flour
  • ½ teaspoon vanilla extract
  • 1 tablespoon sugar
  • 1 teaspoon baking soda
  • 2 tablespoons unsalted butter, melted
  • 1 teaspoon powdered cinnamon for garnish
  • 1/ 2 teaspoon salt
  • Pineapples
  • 1 20z can of sliced pineapple or 1 small pineapple, peeled, cut into eight ½" rounds, cored ( we used can the can)
  • ¼ cup (packed) dark brown sugar
  • butter or oil for pan
Instructions
  1. Heat a cast iron skillet or griddle over medium heat for 2 minutes.
  2. Stir the flour, sugar, baking soda and salt together in the bottom of a medium bowl..Whisk the Sour cream, milk, eggs and vanilla in a separate bowl and stir them into the flour mixture,be careful not to over mix.
  3. Melt about a tablespoon of butter or oil in your skillet or griddle. Depending on how wide your skillet is add the pineapple slices, add one slice for each pancake, make sure you will have enough space in between the pancakes. Cook the pineapple slices for 2 minutes on the first side, sprinkle brown sugar, then flip. After you filled pour ¼ cup of batter on each pancake. Cook for about 2 minutes on the first side, or until bubbles appear all over the surface. flip them carefully and cook for about a minute on the other side. Repeat with remaining batter.

    Serve in a stack, topped with a pat of butter, a cascade of maple syrup and a sprinkle of cinnamon.

Sunday Morning Pineapple Upside Down Pancakes

NGREDIENTS
PREPARATION
Heat a griddle to medium heat.
Rub each pineapple ring with a little brown sugar.
Place a little butter on the griddle. Once melted, place a pineapple ring onto the griddle. Place a maraschino cherry inside the pineapple ring. Ladle about 1/4 cup of pancake batter over the top of the pineapple. Cook for about 1-2 minutes and flip. Cook for another 1/2 minute.
Top with whipped cream and serve.
- See more at: http://www.rachaelrayshow.com/food/recipes/18692_pineapple_upside_down_pancake/#sthash.jZVIIV68.dpuf
NGREDIENTS
PREPARATION
Heat a griddle to medium heat.
Rub each pineapple ring with a little brown sugar.
Place a little butter on the griddle. Once melted, place a pineapple ring onto the griddle. Place a maraschino cherry inside the pineapple ring. Ladle about 1/4 cup of pancake batter over the top of the pineapple. Cook for about 1-2 minutes and flip. Cook for another 1/2 minute.
Top with whipped cream and serve.
- See more at: http://www.rachaelrayshow.com/food/recipes/18692_pineapple_upside_down_pancake/#sthash.jZVIIV68.dpufv
NGREDIENTS
PREPARATION
Heat a griddle to medium heat.
Rub each pineapple ring with a little brown sugar.
Place a little butter on the griddle. Once melted, place a pineapple ring onto the griddle. Place a maraschino cherry inside the pineapple ring. Ladle about 1/4 cup of pancake batter over the top of the pineapple. Cook for about 1-2 minutes and flip. Cook for another 1/2 minute.
Top with whipped cream and serve.
- See more at: http://www.rachaelrayshow.com/food/recipes/18692_pineapple_upside_down_pancake/#sthash.jZVIIV68.dpuf
NGREDIENTS
PREPARATION
Heat a griddle to medium heat.
Rub each pineapple ring with a little brown sugar.
Place a little butter on the griddle. Once melted, place a pineapple ring onto the griddle. Place a maraschino cherry inside the pineapple ring. Ladle about 1/4 cup of pancake batter over the top of the pineapple. Cook for about 1-2 minutes and flip. Cook for another 1/2 minute.
Top with whipped cream and serve.
- See more at: http://www.rachaelrayshow.com/food/recipes/18692_pineapple_upside_down_pancake/#sthash.jZVIIV68.dpuf

Monday, October 20, 2014

Homemade Liquid foundation

  1. 1Arrowroot Liquid:
    • Arrowroot powder (you can also use rice bran powder or orris root powder)
    • Green clay
    • Cocoa powder (or cinnamon/nutmeg)
    • One of the liquid elements listed in the step
    Make the powder first. Use either one of the following two options:
    • Slowly mix the color (cocoa powder or spice) with the arrowroot powder. Stop when you're happy with the color. There is not a lot of precise measuring, just play around with it until it fits your skin tone.
      • To make future batches easier, try to keep in mind how much you end up using and write it down.
    • Mix 2 parts arrowroot powder, 1 part green clay, and add cocoa powder. Mix until the color is right for you.
  2. 2
    Use the powder just made. Then add a few drops of one of the following liquids (start with one or two drops and add slowly after you mix):
    • Essential oil
    • Olive oil
    • Jojoba oil
    • Sweet almond oil
    • Homemade lotion.
  3. 3
    Push this into a compact and use a brush like you would normally, or you can add more to create a liquid.
  4.  

Sunday, October 19, 2014

Homemade Powder Foundation

All Natural Homemade Foundation

Ingredients:
For the base:
Arrowroot Powder
Add one or a combination of:
Cocoa Powder
Ground Cinnamon
Nutmeg
Jojoba, Olive, or Almond Oil (optional)
Directions:
1. Start with a base of arrowroot powder (1 tsp. for dark skin – 1 Tbs. for light skin)
2. Slowly add in one or combination of the cocoa powder, cinnamon, or nutmeg until you reach your desired tone.
3. If you want more of a “compact” foundation, add some jojoba/olive/almond oil to the mixture and press down into a compact. (Start with 5 drops and keep adding until it reaches your desired texture).
Use a brush to apply foundation. Make sure to tap off excess before swiping face.

Friday, October 17, 2014

Low Calorie Festive Cookies

Low-calorie-festive-Cookies 1

Traditional recipes for holiday cookies are one of the most tasty, and at the same time with a minimum of calories. Try any of these two options that simply will not resist them.

vanilla rolls

Ingredients: 50g grounded almonds, 450g flour, 120g butter, 250g sugar powder, 100g yogurt with the vanilla flavor, vanilla sugar 1 packing.

Preparation: Mix the almonds, the flour, the butter, 200g of powder sugar, Yoghurt and the vanilla sugar. Leave the mix to sit about one hour. Shape small  rolls and schedule them on a baking pan. Bake 10 minutes at 180 degrees. At the end decorate with sugar powder, chocolate dressing or jam by desires.

Low-calorie-festive-Cookies-2
Cinnamon Stars


Ingredients: 250gr flour, 170gr butter, 170gr not ground almonds, 30g grated chocolate, 170gr sugar powder, 2 yolk, juice of half lemon,1 tablespoon cinnamon,  whole almonds, 1 squirrel.

Preparation: The butter, the flour, the chocolate, the lemon juice, eggs, the sugar and the cinnamon and mix them in blender. Cover the dough go and leave them to sit about 2 hours at room temperature. Tread to the work surface and remove the asterisk with a mold. Schedule them on the baking pan and bake 10 to 15 minutes at 180 degrees. Decorate them with mixture of protein and almonds. Wishes by adding them yet little cinnamon.

DIY make your own eyeshadow palette

  1.  To make a simple, creamy eyeshadow using all natural colors and ingredients you will need:
    • Arrowroot powder and refined shea butter -- these ingredients form the base of the eyeshadow.
    • Naturals coloring agents -- depending on what color eyeshadow you want, you can use cocoa powder, turmeric, dried beet powder, allspice or nutmeg.
  2. 2
     Depending on the quantity of eyeshadow you want, place 1/4 to 1/2 teaspoon of arrowroot powder in a small bowl.
    • Add your chosen coloring agent (the exact quantity will depend on how deep you want the color to be) and mix with the arrowroot powder until you achieve an even, consistent color.
    • Add the shea butter to the bowl and use the back of a spoon to cream the powder and shea butter together until soft and creamy.
    • Transfer the eyeshadow to an empty lip balm container and tightly replace the lid.
  3. 3
     Although each of the coloring agents described above will create a pretty eyeshadow on its own, you should also try experimenting with mixing different colors to create an eyeshadow with more depth.
    • Mix cocoa powder and dried beet powder to make a pretty pale pink eyeshadow.
    • Mix allspice, cocoa powder and dried beet powder to create a deep mauve colored eyeshadow.
    • Mix nutmeg and turmeric to create a warm golden brown color.
    •  

Thursday, October 16, 2014

Primers, Toners, and Setting Spray

                                Primer oily skin:
1/4 cup Distilled water
1 Tablespoon Milk of Magnesia
Pour into a sterilized trial size spray bottle
Shake well before using.
Lightly mist face.
Even out with a damp cosmetic sponge.
Allow to dry before applying makeup.
Primer Dry skin:
1/4 cup Distilled water 
1 Tablespoon Milk of Magnesia
1 teaspoon Aloe Vera Gel
1-2 Drops Vitamin E oil
Pour into a trial size sterilized spray bottle.
Shake well and Lightly mist face.
Even out with a damp cosmetic sponge.
Allow to dry before applying makeup.
 Setting spray:
Sterilized trial size spray bottle.
Add 1/4 cup Distilled water to bottle and
1 Tablespoon Aloe Vera Gel or Vegetable Glycerin and
2 drops of Vitamin E oil and
Shake well before applying to face.
Toner: MY Favorite!
Pour 1/4 Cup Rose Water into a container and add
1 Tablespoon vinegar and
1 Drop Lavender oil and 
Shake well before using
Refrigerate
For Oily skin:
Pour 1/4 Cup distilled water into container and add
2 teaspoons honey and
1 teaspoon mild liquid soap and
Shake well before using
Refrigerate

Wednesday, October 15, 2014

Homemade Overnight Zit Zapper

Homemade Zit Zapper

This is the easiest thing to make that gets rid of pimples. It sounds a little counter productive...oil to help an oily face? But for many people, oil isn't the issue  and this may be a great and easy solution for you. All you need is:
  • Coconut Oil
  • Tea Tree Oil
  • Lip Balm Tubes
On the stove top, melt 1/8 cup of coconut oil (if it's a hot day you can skip this step and just use your melted coconut oil instead!). Add in just a few drops of tea tree oil (no more than 5). Mix to blend and then use an eye drop dropper to add the mixture into the lip balm tubes. It should only take a few minutes for the coconut oil to set up. (If your kitchen is warm, stick the tubes in the fridge first.) Store the tubes in the fridge so they don't melt and use as needed as a homemade zit zapper spot targeting treatment. This method works very well for me!
Why does this work?
Coconut Oil is naturally antibacterial and anti-fungal. It helps with redness and puffiness and will fight bacteria. Tea Tree Oil is also antibacterial and anti-fungal so it gives it an extra kick. You can apply this homemade zip zapper as needed.

Sunday, October 12, 2014

Homemade Natural Mascara

Coconut Mascara

Ingredients:

  • 2 tsp coconut oil
  • 1 tsp shea butter
  • 1/2 tsp bees wax
  • 1/2 tsp (or 1-2 capsules) activated charcoal

Instructions:

  1. Heat the coconut oil, shea butter, and bees wax in a small sauce pan over low heat. I like to put mine in a glass dish over a small saucepan of boiling water, but it is not necessary.
  2. Stir continuously.
  3. Once these are melted, add the charcoal powder.  You can add a bit of cocoa powder for brown-black mascara.
  4. Pour into small container and apply with a small brush.

Egg Yolk Mascara

This is my favorite one.  I feel like it goes on nicely, adds volume, dries, and does not flake.  It’s like tempera for your face. This will keep for a few weeks, so make a small batch and enjoy.

Ingredients:

  • 1 egg yolk
  • 1 tsp activated charcoal (or 2-4 capsules)

Instructions:

  1.  Separate the yolk from the white
  2. Add activated charcoal and mix.  You can add a bit of cocoa powder for brown-black mascara.
  3. Pour into small container and apply with a small brush.
  4. Keep it in your fridge.  It won’t be too cold, because it just goes on your eye lashes, not skin.

Clay Mascara

Ingredients:

  • 4-1/2 tsp Australian black clay
  • 1/2 tsp Australian red reef clay
  • Pinch guar gum
  • 1/4 tsp vegetable glycerin
  • 1-1/2 tsp water

Instructions:

  1. Combine all the above ingredients and mix well.
  2. Pour into small container and apply with a small brush.

Thursday, October 9, 2014

Homemade Sports Drink Recipe

Homemade Rehydration Drink RecipeHomemade Gatorade or Laborade

  • 1 cup lemon juice (approx 6-8 lemons)
  • 1/2 cup honey or maple syrup
  • 1 teaspoon sea salt
  • 1/2 teaspoon baking soda
Place in a pint mason jar and stir to combine (the lemon juice and baking soda will react, so stir it down), keep concentrate in the fridge.  This can be added to 1 gallon of filtered water, or add 1-2 tablespoons to each 8 ounces (1 cup) of water.

Turmeric face mask

Make your own turmeric face mask

1. Mix flour, turmeric, honey and milk to make a paste
  • 2 tablespoons of flour. You can use regular flour, rice flour or ground oats if your skin is dry.
  • 1 teaspoon turmeric
  • 3 tablespoons milk. You can also use yogurt to fight acne.
  • A few drops of honey
2. Apply a thin layer to your face and let it dry for 20 minutes
3. Rinse off in the shower, scrubbing gently to remove.
4. Apply your favorite moisturizer.

Homemade Vaseline

Homemade Vaseline

When we have a cold and one very runny, stuffed up nose there isn't anything better than a nice smear of petroleum jelly across the sore, red, chaffed spots.
Well, except the petroleum part.
In the winter where we live, the wind blows like it's forgotten to do it's job all year (even though it really hasn't because the wind blows all year around). It seems like everything gets chapped and there isn't much we can do about it, being a family that likes to use all things natural. We don't use petroleum on our skin because, think about it...petroleum jelly is the by product of oil production that has been refined and processed, and isn't really something that needs to be on our skin, especially not when we are trying to heal our bodies.
Lucky for all of us, it turns out that a homemade, all natural version of homemade Vaseline is super easy to whip up! Here's all you need:
Homemade Vaseline
What You Need:
  • 1 ounce or 1/8 cup Beeswax
  • 1/2 c. olive oil
What to Do:
Mix the ingredients together in a saucepan and heat on a very low heat until the beeswax has melted. While it's warm, pour into a jar or another container. Use as you would Vaseline. This recipe made enough to fill a little half pint glass jelly jar. Oh and the little black flecks in mine are Vanilla Essential Oil.
Extras:
You could add several different essential oils to this mixture for various healing properties. I would definitely consider adding either Tea Tree Oil, Peppermint Oil, or Lavender Oil depending on what you want to use it for.
For beeswax, I really like buying those beeswax pellets versus the blocks. They are so much easier to measure for projects like this instead of trying to cut a chunk off a large block. Additionally, I haven't found the pellets to be much more expensive than the blocks. You also want to make sure you stick with the yellow pellets versus the white, as the white have been refined and stripped of many natural properties.

Wednesday, October 8, 2014

DIY Eye cream


What you’ll need:
  • 3 tsp jojoba oil
  • 3 tsp apricot-kernel oil
  • 1 tsp beeswax
  • 5 tsp rose water
  • 1/4 tsp baking soda
  • 5 drops carrot-seed essential oil
What to do:
  • Put the jojoba oil, apricot-kernel oil and beeswax into a small saucepan and heat the mixture over very low heat just until the beeswax has melted.
  • Remove from heat blend up all the ingredients with a whisk.
  • In another small saucepan, warm the rose water over very low heat and add the baking soda; stir until the baking soda is dissolved, and remove from heat.
  • Place the saucepan with the oils and wax into an ice bath. With a small whisk, rapidly stir wax and oils while drizzling in the rose water and baking soda mixture. The cream should set quickly.
  • When the eye-wrinkle cream is cool, mix in the carrot-seed essential oil.
  • Put the finished eye cream into a clean 2-oz. cream or cosmetic jar.
Your brilliantly concocted eye cream will keep for about a month at a cool room temperature, or 2 months if you refrigerate it. 

DIY Craving Cranberries lip gloss


What You’ll Need:
  • 12 Fresh Cranberries
  • 1 Tablespoon Avocado Oil (any Vegetable Oil will work)
  • 1 Teaspoon Honey
  • 2 Drops Vitamin E (or one capsule)
  • 1 Cheese Cloth
  • 1 Tiny Tin of Your Own Choosing
What To Do:
  1. Heat up the Cranberries, Oil, Honey and Vitamin E on the stove top, bringing it to a boil
  2. Crush up the Cranberries with a wooden spoon until the color has turned to your lip-stain liking
  3. Let it cool for ten minutes and then strain through Cheese Cloth to get out the Cranberry bits
  4. Let it cool again – but not too long – and then spoon it into your Tin
And into the purse it goes, the best lip gloss. Remember: this recipe can be amended to include any seasonal fruit, all hues considered.